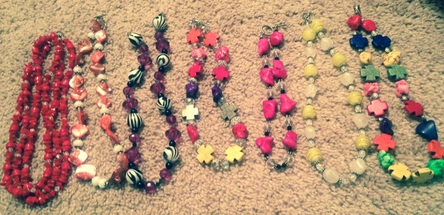
Just a few of my many beading creations
Show season is fast approaching us, and as every show girl knows the best part of show season is not the animals, boys, or barn...it's the BLING! We start breaking out our Miss Mes/Rocks, bedazzled show sticks, and more importantly our oversized jewelry. I am a bling addict myself, but I am also a broke college student who finds it hard to fork over $25-$40 for one of those flashy necklaces sold at the little boutiques set up around the show ring. Luckily for me, I know how to make my own jewelry for less than $10, and after this blog post you should be able to too!
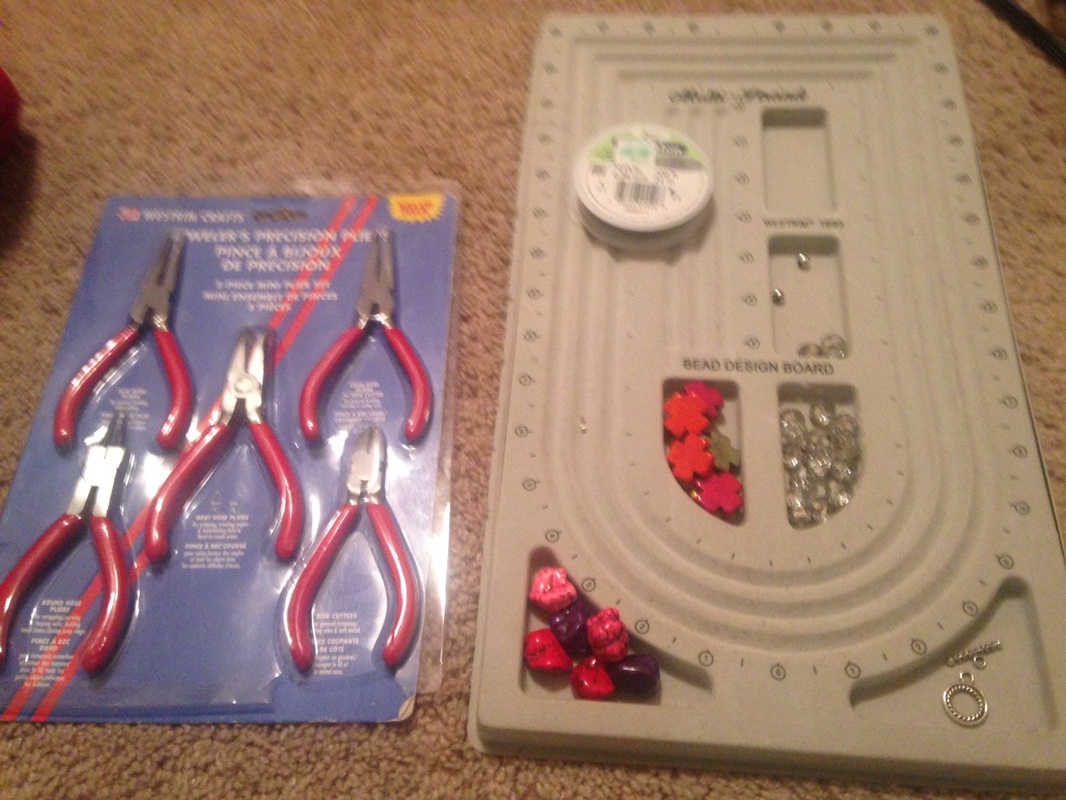
What you'll need
-Beads galore (big chunky beads, smaller beads for in between the big ones, etc. this is all up to you)
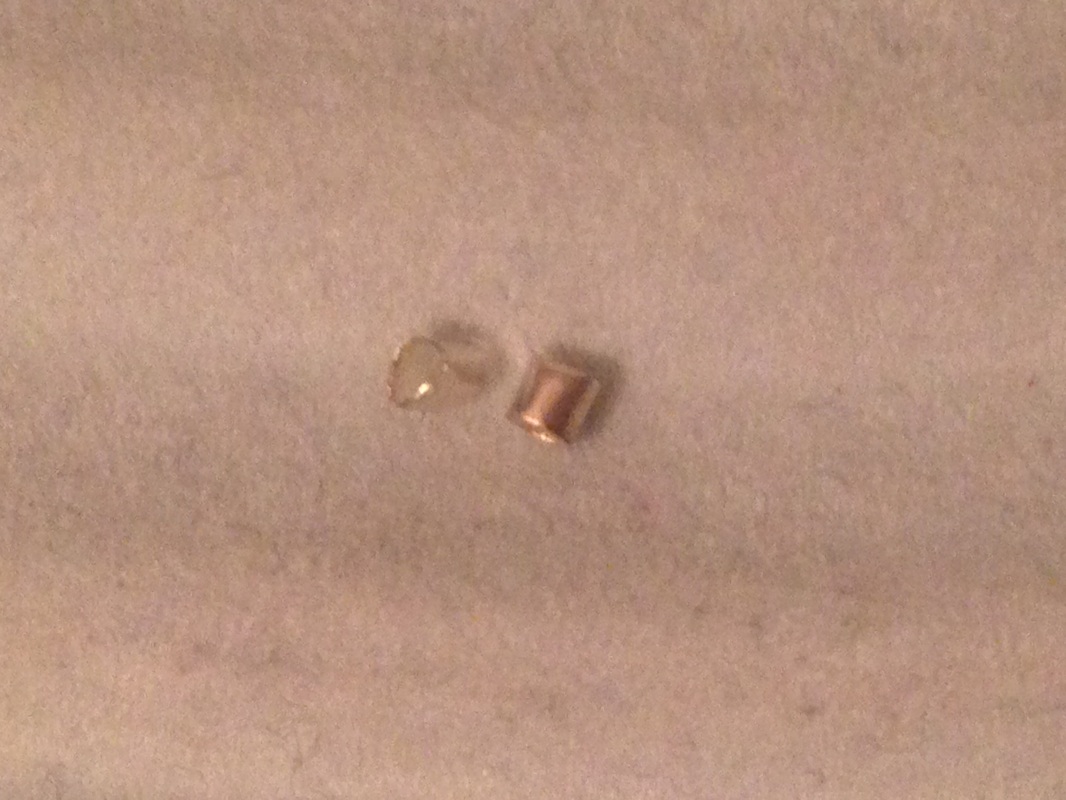
-2 tiny end beads- Not for sure their exact name but they are pictured in the gallery. Super small and rectangular with large holes.
-.15 in. wire (Don't use elastic, it will not last very long)
-Toggle or clasp
-flat nose plier
-side cutters
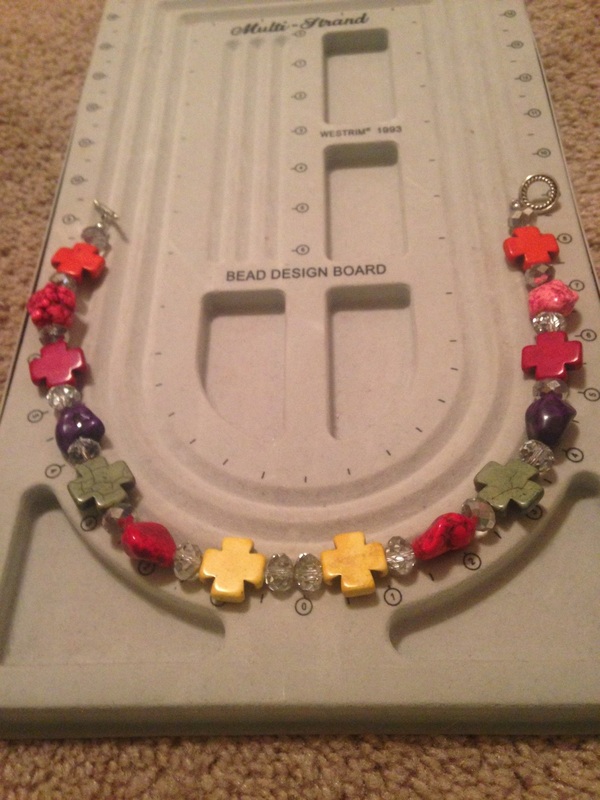
-bead design board
Steps to create your own bling necklace.
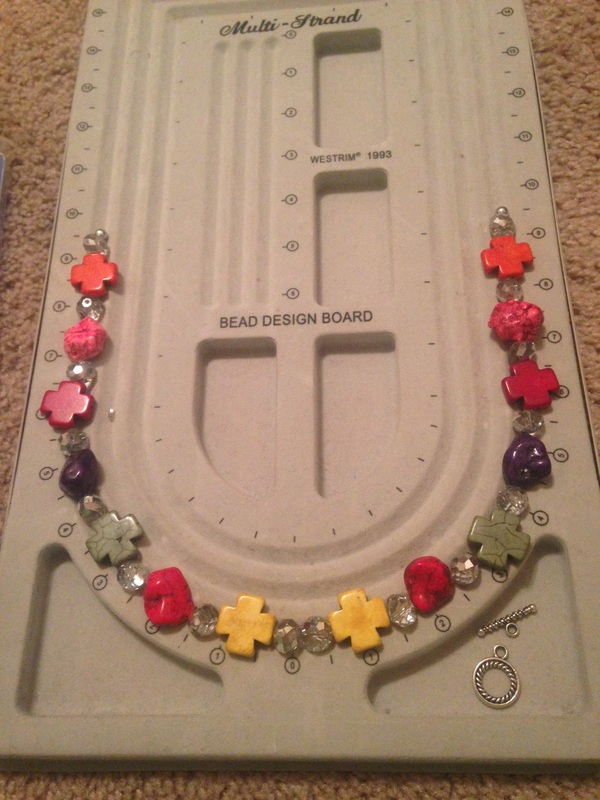
1. Measure your neck. This can be done by taking a piece of string and wrapping it loosely around your neck, then placing it on the design board. For me, I shoot for about 18 in. in length.
2. Start designing your necklace on the design board. I like to start at 0 in and work my way out on both sides to keep it symmetrical. I try to design up to at least the 9 in. mark on both sides. I also tend to put two smaller beads in the exact middle so I can clasp my pennants over them, but this step is totally up to you and your creativity!
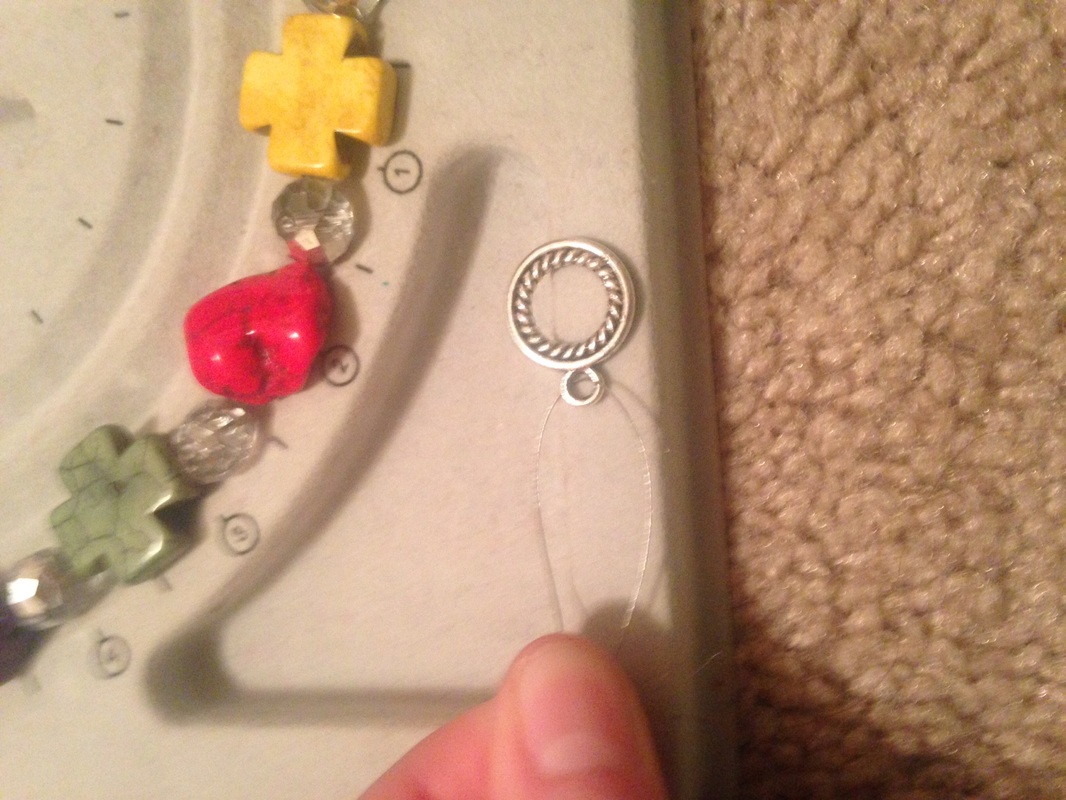
3. Cut your wire with your side cutters. Now, I double string my wire to make it stronger. I also cut off a lot of extra wire than I need just in case. So, if your making an 18in necklace, you will need at least 36 inches of wire, but I would recommend starting off with more like 48 inches of wire. Once you have it all cut out, fold your wire in half. String one part of your toggle through one strand of your wire so it straddles the folding point (shown below).
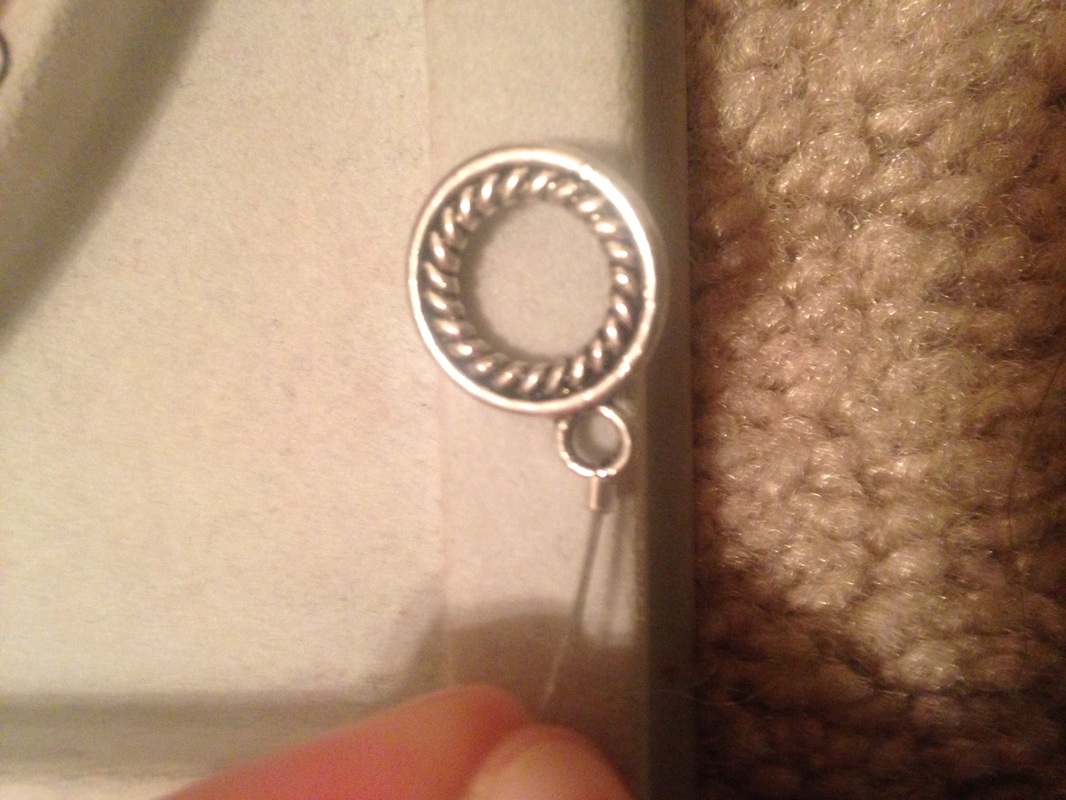
4. String one of your tiny end beads in between the two strands until it's right up against your toggle (shown below). Then use your flat head pliers to squish that tiny bead flat. This will help keep your two strands of wire close together and keep your toggle from moving up your necklace.
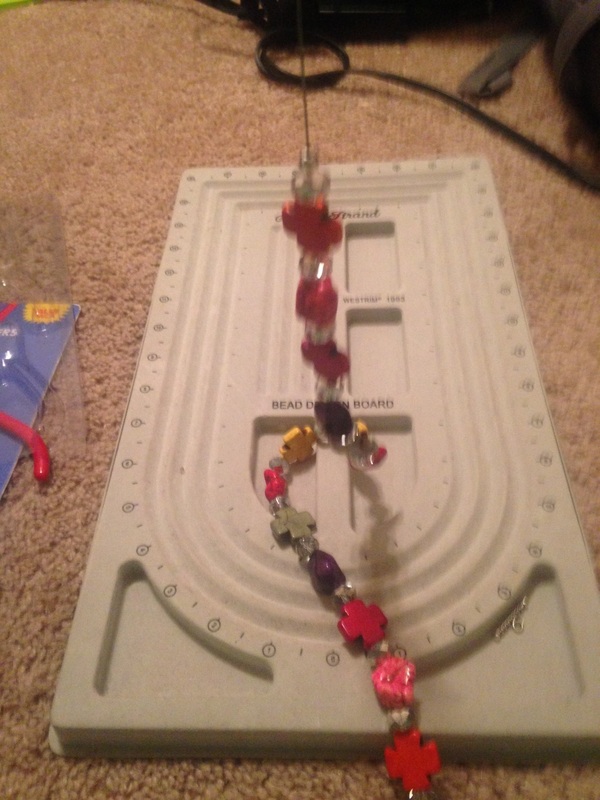
5. Start stringing your beads onto your wire strands (shown below).
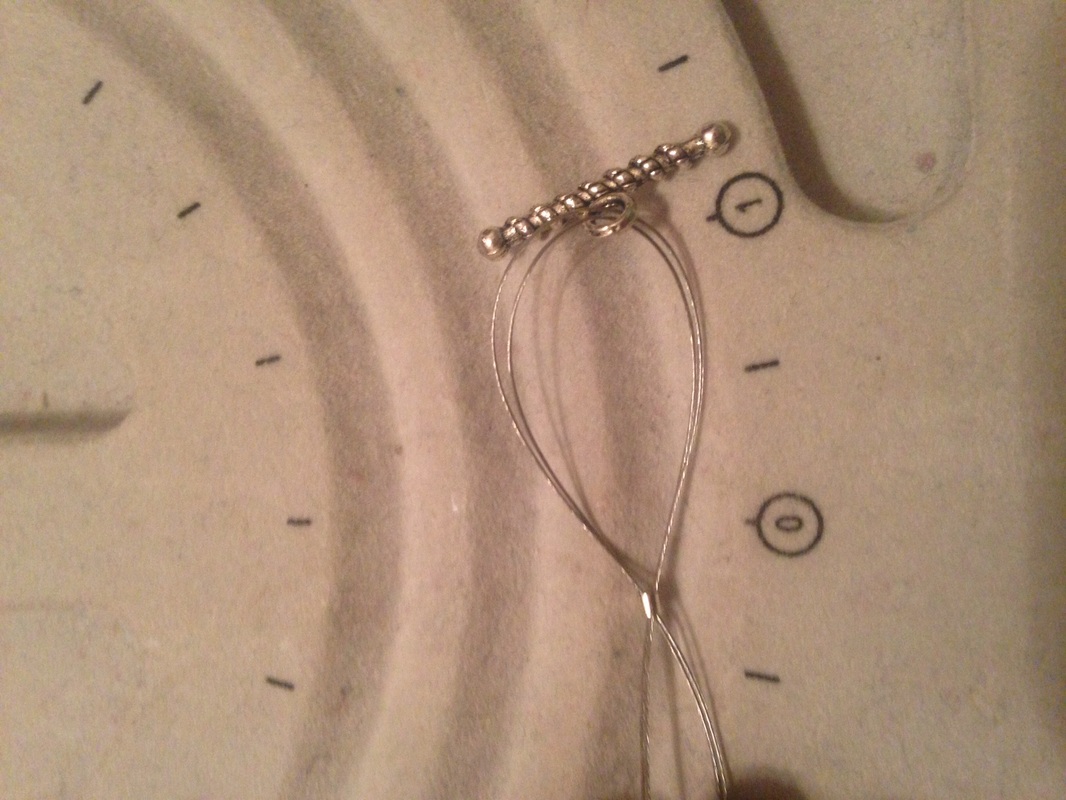
6. This is the trickiest step, but it still isn't too bad. Once all your beads have been added to the wire strands, add another tiny end bead and the other half your toggle. Then loop the wire strands together around the toggle's end piece and back through the tiny end bead (shown below). Pull the wire strands tight to get rid of any gaps in your necklace. Flatten the second tiny end bead with the flat head pliers. Cut the excess wire off with your side pliers, cutting as close to the tiny end bead as possible or else you will have wire scratching your neck.
7. Show off your new creation at all your bling required events :)
The pictures below show the steps above in order
What you'll need
-Beads galore (big chunky beads, smaller beads for in between the big ones, etc. this is all up to you)
-2 tiny end beads- Not for sure their exact name but they are pictured in the gallery. Super small and rectangular with large holes.
-.15 in. wire (Don't use elastic, it will not last very long)
-Toggle or clasp
-flat nose plier
-side cutters
-bead design board
Steps to create your own bling necklace.
1. Measure your neck. This can be done by taking a piece of string and wrapping it loosely around your neck, then placing it on the design board. For me, I shoot for about 18 in. in length.
2. Start designing your necklace on the design board. I like to start at 0 in and work my way out on both sides to keep it symmetrical. I try to design up to at least the 9 in. mark on both sides. I also tend to put two smaller beads in the exact middle so I can clasp my pennants over them, but this step is totally up to you and your creativity!
3. Cut your wire with your side cutters. Now, I double string my wire to make it stronger. I also cut off a lot of extra wire than I need just in case. So, if your making an 18in necklace, you will need at least 36 inches of wire, but I would recommend starting off with more like 48 inches of wire. Once you have it all cut out, fold your wire in half. String one part of your toggle through one strand of your wire so it straddles the folding point (shown below).
4. String one of your tiny end beads in between the two strands until it's right up against your toggle (shown below). Then use your flat head pliers to squish that tiny bead flat. This will help keep your two strands of wire close together and keep your toggle from moving up your necklace.
5. Start stringing your beads onto your wire strands (shown below).
6. This is the trickiest step, but it still isn't too bad. Once all your beads have been added to the wire strands, add another tiny end bead and the other half your toggle. Then loop the wire strands together around the toggle's end piece and back through the tiny end bead (shown below). Pull the wire strands tight to get rid of any gaps in your necklace. Flatten the second tiny end bead with the flat head pliers. Cut the excess wire off with your side pliers, cutting as close to the tiny end bead as possible or else you will have wire scratching your neck.
7. Show off your new creation at all your bling required events :)
The pictures below show the steps above in order
 RSS Feed
